Sunday 24 June 2012

The Perfect Boiled Egg (and Salad Nicoise)

And...I'm back!
Little Ms. has had a busy week - hence the delay in this post...my apologies - its been far too long. Although its been a busy week, its also been a great week. I am now officially a real (not almost) lawyer and I still love food! Although I haven't been posting, I've still been cooking, so let's get down to business.

Little Ms. used a recipe to make a hard boiled egg. That's right, I said it - I used a recipe to boil an egg...and I was rewarded with a  soft, bright, pure yellow yolk and a pleasingly firm white. I was inspired to make this recipe by the cover of the May issue of Canadian Living magazine, which featured this salad. It is a classic nicoise salad, with the simple twist of using rainbow trout instead of tuna. Apart from following the recipe in order to make my perfect boiled eggs, I used most of the ingredients suggested in the recipe, with the exception of the salad dressing. Rather than using the vinaigrette suggested in the recipe, I made my own based on PC's Black Label Walnut Mustard, which added a rich, nutty flavour to the dressing. I steamed my vegetables, rather than boiling them, to retain more flavour. I also used more greens then would be used in a traditional nicoise salad.

On another note - I've realized that I haven't been noting how many servings each recipe makes. Going forward, I will strive to do this so you can determine if the recipe is tonight's dinner or dinner for the rest of the week.

the eggs!

When making the eggs, use a pot that is big enough to hold the eggs, covered by a minimum of an inch of water. Place the eggs in the pot and cover with water. Place the covered pot on the stove over high heat and bring the water to a boil. As soon as the water is boiling (look for a lot of steam), remove the pot from the heat, leaving the lid on the pot. Set a timer for 18 minutes. After the eggs have sat in the hot water for 18 minutes, drain the water from the pot and run the eggs under cold water for 1 minute, until they are cool enough to handle. Now peel the eggs. Boiling the eggs this way makes them super easy to peel. Just crack into the shells by rolling them on the counter and begin peeling. 

the salad! 

Serves 2 people

1/2 lbs fresh rainbow trout
about 15 mini potatoes, steamed
about 20 green beans, steamed
4 perfect hard boiled eggs
10 nicoise or other black olives
20 grape tomotoes (you could use two plum tomatoes instead)
1/2 head red leaf lettuce
2 handfuls of arugula 
salt and pepper to taste
1 tbsp olive oil

dressing
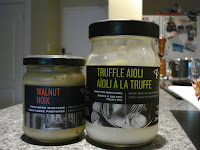
1 tbsp PC Black Label Walnut Mustard or other Dijon style mustard
1 tbsp mayo (I used PC Black Label Truffle Aioli) 
3 tbsp olive oil
1 tbsp white wine vinegar
1 tbsp lemon juice
2 tbsp finely chopped fresh basil
1 tsp finely chopped fresh thyme leaves
big pinch of salt
big pinch of pepper

Mix all the ingredients for the dressing together and set aside.

Steam the potatoes for about 12 minutes, or until fork tender. When the potatoes are done, toss the beans into the steamer and steam for 2 minutes. At this point, you could toss the hot potatoes and beans with about 2 tbsp of the prepared salad dressing, so that the veggies can absorb the flavour. I didn't do this and my salad turned out really wall, but doing it would amp up the flavour.

Heat a frying pan on the stove with 1 tbsp olive oil. Sprinkle the trout well with salt and pepper. Once the pan is hot, add the trout, flesh side down. Cook on the trout flesh side down for about 4 minutes. Flip the trout to crisp the skin, cooking on the other side for about 2 minutes. 

Toss the salad greens with the dressing and then add the other ingredients, tossing the salad again. I plated this salad before tossing the ingredients with the dressing, just for the photos, but tossing the salad in a big bowl is probably the best way to distribute the flavours evenly throughout the salad. Serve and enjoy!


Wednesday 13 June 2012

Dulce de Leche Brownies

Little Ms. and Big Mr. got invited out for dinner last Friday and Little Ms. offered to bring dessert. The dessert had to come together quickly, with ingredients that were on hand and it had to be delicious.
Little Ms.' friend suggested David Lebovitz's blog and there she discovered the perfect recipe for a quick and casual dessert: dulce de leche brownies.
Dulce de leche is a thick South American caramel spread made out of sweetened condensed milk. You can make your own dulce de leche, but Little Ms. used President's Choice brand pre-made dulce de leche.
This recipe was adapted from David Lebovitz's. Little Ms. loves to add a little coffee to any chocolate-based dessert because it amps up the chocolate flavour, so that was done here. The remainder of the adaptions were to account for the fact that Little Ms. only had half the amount of chocolate required for the original recipe. With a little ingenuity and double the cocoa powder, the lesser amount of chocolate is not missed in the least. These brownies come together in a snap (and with very few dishes, always a bonus!)
Recently someone commented that Little Ms. Meals' recipes were for the advanced cook. Little Ms. wanted to take a moment to rebut that presumption. Although some of these recipes may have a lot of ingredients, many of them can be found at your usual grocery store and most of them you may already have on hand. AND - if you don't; leave it out. Remember the Little Ms. Mantra and own it. You can change, substitute or leave out almost anything to these recipes with great success, as long as you measure success by what tastes good to you. Have fun with it!

Dulce de Leche Brownies

1/2 cup butter
3 ounces semi-sweet chocolate, chopped 
1/4 cup brewed black coffee, cooled
2 eggs
3/4 cup sugar
1/2 cup cocoa powder
1/2 tsp baking powder
1/2 tsp salt
3/4 cup cake & pastry powder 
1/2 - 3/4 cup of prepared dulce de leche
Flaked sea salt, to taste (optional)


First prepare the pan. You'll need a 9 x 9 in square pan. Cut two pieces of foil which are long enough to hang over the sides of the pan. The pieces of foil should be about 16 in long each. Fold each piece foil lengthwise so that each piece measures 9 in x 16 in. Place the foil pieces inside the pan, perpendicular to each other so that the bottom and sides of the pan are fully covered with foil. Spray the bottom and sides of the pan with non-stick cooking spray or butter lightly. 

Preheat the oven to 350.

Now prepare the batter. 
Melt the butter and chopped chocolate together in a double boiler. If you use a large glass or metal bowl as your double boiler, as Little Ms. did, it will cut down on dishes as you can add and mix all of your ingredients in this bowl. 

As the chocolate and butter melt, whisk together. Once both the butter and the chocolate are completely melted, whisk to incorporate. Remove the bowl from the top of the double boiler and add coffee. Whisk together and add sugar and cocoa powder. Whisk in eggs.


 Add flour, salt and baking powder to the mixture and whisk just until incorporated.

Pour half of the batter into the prepared pan.
Drop the dulce de leche by the spoonful in a 3 x 3 square. Start by dropping 3 spoonfuls of the caramel about 2 in from the top of the pan on to the top of the batter. Repeat with the next 2 rows. Essentially you're making a grid with spoonfuls of dulce de leche. (The saying "a picture is worth a thousand words" comes to mind here - Little Ms. really wishes she had taken a picture at this stage!)


Using a butter knife or spatula, drag your knife through the dulce de leche to create a swirl pattern with the caramel and the chocolate batter.

Pour the remaining half of the batter over your swirled batter and repeat the dulce de leche grid pattern as above. Drag through with a knife to create a swirl pattern on the top layer. If you're using the flaked sea salt, sprinkle it lightly over the top of the brownies. Like coffee and chocolate, the salt really makes the caramel sing in that delicious, savoury-sweet way. If you haven't tried salted caramel, I would highly recommend it!

Bake in the centre of the pre-heated oven for approximately 20 - 25 minutes. If you like chewy brownies, check on them in the oven after 20 minutes. You'll know that they're done when a tooth pick inserted into the centre of the brownies comes out with a few crumbs clinging to it.

Allow to cool, cut and enjoy!

Monday 11 June 2012

Chicken Banh Mi Sandwiches

Open wide!


Little Ms.' trip to PAT Central led to a fridge full of Asian ingredients, so here is riff off of a Vietnamese sandwich, the banh mi. These traditional sandwiches are trendy now. Little Ms. isn't one to pretend that she didn't conduct a Google search while writing this post, and therefore, she will direct you to good old Wikipedia for more info on the banh mi.
This particular version of the sandwich was inspired by Little Ms.' love for the pickled dikon and carrot that often accompany dishes ordered at your local pho restaurant, and the fact that Little Ms. found dikon at PAT Central. Inspiration was moved to action by the 3/4 of a lbs of ground chicken kicking around in the Ms./Mr. fridge from yesterdays Kimchi Burritos.
Little Ms. was certain that she got the idea for a banh mi made out of a meat-ball type form from watching an episode of Eat St. featuring an awesome food truck called Great Balls on Tires. However, there does not appear to be a Vietnamese inspired ball on that food trucks's menu, so, either it was an "Odd Ball" or, Little Ms. is having a crazy moment.
Either way, these sandwiches were really great, although Big Mr. felt that there was a lot of bread. Little Ms. would have to agree - the bread, a Calabrese-style loaf from Cob's Bread, was a little dense. Little Ms. would suggest a traditional French baguette next time.

Chicken Banh Mi

Pickled Carrots and Daikon

While conducting research for this blog post, Little Ms. discovered that traditionally this condiment/topping is shredded. Who knew?! Little Ms. put her knife skills to work and julienned these veggies. Shredding or using a mandaloin would would make this quick pickle come together very quickly.

1/2 dikon raddish, julienned or shredded
2 carrots, julienned or shredded
1/2 cup rice wine vinegar
2 tbsp sugar
t tsp salt

Mix together vinegar, sugar and salt in food storage container (preferably glass - this dikon smells funky after its sat for a few days and the smell may linger in a plastic container). Add julienned veggies to the vinegar mixture, toss to coat. Cover container and refrigerate for an hour or up to 2 days. If you veggies are cut larger, they will need longer to pickle. 

Meat "balls"

Rather than make these into actual balls, I made oblong shaped patties the same size as the bread, so that there was more room for toppings on the sandwiches.

3/4 lbs extra lean ground chicken
1 scallion, finely chopped (very finely - remember Big Mr.'s dislike of onions)
the steams from 3/4 branches of cilantro, chopped very finely
1 tbsp Thai basil, chopped finely
1 tbsp fresh mint, chopped finely
1 clove of garlic, grated using a rasp
1 inch piece of ginger, peeled and grated using a rasp
1 tsp sirracha chili sauce
1 tsp soya sauce
1 tsp toasted sesame oil
2 tbsp dry bread crumbs
2 tbsp grape seed oil

Mix all of the above ingredients, with the exception of the grape seed oil, into the ground chicken. Form the mixture into patties about 2 cm thick, 4/5 cm wide and 10 cm long. The mixture will be very tacky. Do not panic! Place the patties one a tray and coat each patty in grape seed oil. This adds necessary fat to these lean chicken patties and makes them easier to handle when they are grilled.

Preheat the BBQ to high. Once the BBQ is hot, place patties on the grill and cook over high heat for about 3 minutes each side. Once you put the patties on the grill, WALK AWAY! The key to great grill marks and great seared-in BBQ flavour is NOT to play with the meat once it is on the BBQ. You'll know when the patties are ready to flip when the meat releases itself from the grill easily when you slide a spatula underneath.
Check out those grill marks!

Once the patties are cooked through, remove from the grill. When working with chicken, Little Ms. always cuts into the thickest patty to ensure that everything is cooked all the way through. No one likes salmonella.

Toppings and assembly

Pickled carrots and daikon, above
3 tbsp mayo, mixed with 1 - 2 tsp sirracha chili sauce
1/2 a ripe avocado, sliced
I served my Banh Mis with a grilled bok choy salad...
1/2 cup cilantro leaves
1/2 cup watercress
a few leaves of fresh mint
a French demi-baguette, sliced in half lengthwise and toasted on the grill

To assemble the sandwiches, spread each side of the toasted bread with sirracha mayo. Place toppings of choice on the bread along with chicken patties and enjoy! As always, all toppings are optional, so style as you will.


Friday 8 June 2012

Kimchi Burritos


This past weekend, Little Ms. went on an adventure...in her very own city! As mentioned, this is one of the things that Little Ms. enjoys about living in a thriving and diverse metropolis. Sure, the TTC is unpredictable and you have to be diligent about remembering your reusable bags, but Toronto is a great city to have a culinary adventure in, without ever getting on a plane.
Little Ms.' adventure took place in Little Korea, at a PAT Central Market. Little Ms. did not intend to embark on a culinary adventure on this rainy Sunday, but she did want to make kimchi burritos and as her friend, Ms. G, noted, the market was on their way home. Little Ms. entered the market and never looked back. PAT Central has many exciting and inspiring food products to offer, and Little Ms.' culinary juices were immediately flowing. Beyond specialty Korean products, including kimchi, PAT Central also had a lot of harder-to-find produce items, like garlic scape and quince. They also have samples. Enough said. Go there!
Although the trip to PAT Central yielded many finds, it was really all about getting good quality kimchi. Little Ms. won't go into a lot of detail explaining what kimchi is, because Google is now a verb for a reason, but suffice it to say that kimchi is a savoury, spicy, crunchy, quintessentially Korean side dish (or is it a condiment? topping?). Little Ms. briefly investigated making her own kimchi, but decided not to be crazy. If you feel crazy, check out this instructional video.
Thanks to Ms. G for showing Little Ms. the way to kimchi burrito happiness.
This recipe was inspired by another food blog, cHow Divine.

The Kimchi!

Kimchi Burritos

These burritos have 2 components: the kimchi fried rice and tofu/chicken, plus toppings. Its a great recipe to use up leftover steamed rice.
I purchased a marinated tofu at PAT Central to use in the tofu version, but cubes of firm tofu tossed in a little soya sauce and sirracha would work well too. The kimchi fried rice has lots of flavour.
Purchased marinated tofu.

This recipe has a lot of ingredients, but is easy to prepare. If you're using leftover rice, its definitely a weeknight dinner. Use a fine grater or rasp to deal with the garlic and ginger and you'll be in burrito heaven in about half an hour.


Kimchi Fried Rice

The measurements in the recipe make a TON of fried rice - more than enough for 6 burritos, which will easily serve 4 people with big appetites and 1 person with a huge appetite. If you're only serving 2 or even 3 people, I'd half the recipe or resign yourself to eating kimchi fried rice for a week.

2 cups cooked (steamed) basmati rice, cold
2 eggs
2 tbsp soya sauce
1 tbsp sirracha
2 tsp sesame oil
1 tbsp grape seed oil, or other neutral flavoured oil with a high smoke point
1 1/2 cups prepared kimchi, with juice
2 mini bok choy, washed, stems sliced thinly and leafy green leaves reserved for toppings
1 inch piece of peeled ginger, chopped finely
1 large clove of garlic, chopped finely

How I sliced my bok choy stems and leaves

Chicken Filling (for 2 burritos)

1/4 lbs extra lean ground chicken
1 tbsp soya sauce
2 tsp sirracha sauce
1/2 inch piece of peeled ginger, chopped finely
1 small clove of garlic, minced
1 tbsp grape seed oil

Toppings

1/2 cup of fresh cilantro leaves
1/2 cup of grated old cheddar cheese
extra kimchi 
sirracha to taste
reserved leaves from bok choy, above
4 x 10 inch flour tortillas (I used whole wheat for mine and white for Big Mr.'s)

If you're making the chicken filling, prepare if first. Heat a medium frying pan on the stove over medium heat with grape seed oil. Once the oil is hot add the chicken, garlic and ginger. Break the chicken into smaller pieces while it cooks in the pan. Add the soya sauce and sirracha to the pan once the chicken is cooked through. Cook for 30 more seconds until the sauces are absorbed into the chicken. Set aside and keep filling warm.

To prepare the rice, put a large frying pan on the stove to heat with the grape seed oil. Meanwhile, beat the eggs in a small bowl, using a fork. Add  a dash of soya sauce to the eggs. Once the pan is screaming hot, pour the eggs into the oil at once at swirl the pan, so the eggs create a thing pancake-like layer. Cook the eggs through fully, all on one side, or channel your inner Iron Chef and jostle the pan to flip the eggs. (Owning it comes in here - I Iron Chef-ed these eggs, and they didn't come out perfectly - but they almost did. You're going to slice the eggs into ribbons anyway, so here's a great recipe to practice this impressive party trick.) Once the eggs are cooked, remove from pan to a cutting board and fold your egg pancake in half to make for easier slicing. Slice the eggs into long, thin ribbons.

My Iron Chef-ed eggs. Not perfect, but no one will know. The high heat makes them amazingly puffy. 


Put the pan back on the heat, and without adding any additional oil, add cold cooked rice to the pan, followed by garlic and ginger. The pan will be very hot at this point, so if you add your aromatics before your rice, the garlic will burn. Trust me, I learned from experience. Stir the rice to heat through, breaking up any clumps of rice. If you're having trouble breaking up the clumps, add a few drops of water to the pan to create some steam.

While the rice is heating, chop up your kimchi. I found the easiest way to do this without loosing too much juice was to chop the kimchi in the container using kitchen shears. Don't worry about size - you just want to break the cabbage down into smaller pieces.

Once the kimchi is chopped, add it to the pan and mix through the rice. Add chopped reserved bok choy stems to pan and mix. Add 2 tbsp soya sauce, sirracha and sesame oil to the pan. Top with ribbons of egg. You're done! Remove from heat.

Now - make you're burritos. Starting in the centre of your wrap, make a rectangle with the kimchi fried rice, making sure to get a few egg ribbons in each burrito. Working to the right of the rice, add about 1/3 cup of cooked chicken filling to the burrito, along with whatever toppings you choose. All the rice, filling and toppings should be on one half of the wrap with space one all sides. To fold, start with folding the wrap once so that most of the filling is now face down, then fold in the sides of the wrap and continue rolling the burrito. Its key not to over stuff your burritos. Over-stuffing will surely result in eating your burrito with a fork and knife.

If you're using the tofu, you can either heat it in the microwave or just push some of your fried rice away from the centre of the pan and heat your tofu with the rice once you have finished cooking it.


I was nervous about the interplay of cheddar cheese with all these distinctly Asian flavours, but it totally works! The cheddar adds a nice mellow, rich flavour to the sharp and spicy hits from the kimchi. Since cilantro is used in South American and Asian cuisine, I think its responsible for the cohesiveness of this fusion dish, I wouldn't leave it out (sorry Norbert). Both bok choy leaves, cilantro and extra kimchi add additional crunch to the burritos.
Cilantro - the world's most widely used herb. The ultimate ingredient in fusion cooking. The solution to world peace?

Wednesday 6 June 2012

Blueberry Coffee Cake

This blueberry coffee cake was borne of my love of a deal. I just couldn't pass up two pints of blueberries for $4. BUT Big. Mr. and I could not possibly eat two pints of blueberries before they went bad. So - I made a cake. This not only permitted me to use my blueberries, but also satisfied Big Mr.'s insatiable desire for baked goods.
In keeping with my promise to you readers, rather than just breaking out my one cup measure and tossing things into a bowl, I measured and wrote things down. And I was rewarded with a pretty darn good cake. The cake is light, moist and slightly tangy, thanks to the yogurt and cake and pastry flour. The lemon juice and zest set the blueberries off nicely (I've rarely encountered a fruit that was not made more "fruit-y" by the addition of some lemon juice). 
I did think that perhaps the sugar in the recipe could have been scaled back further, and I would do the topping differently. Unlike most coffee cakes that use flour in their crumb topping, in true Little Ms. fashion, I decided to substitute regular flour for almond flour (ground almonds). I then sprinkled this mixture on top of the prepared cake batter. As you can see from the photos below, when the cake went into the oven, the topping was perched nicely atop the light yellow batter. However, about fifteen minutes into baking, my beautiful topping was consumed by the rich cake batter and became buried a ribbon of cinnamon-infused almonds, rather than a crunchy crumb topping. The result was by no means disastrous. The recipe for this cake is a keeper, although next time I would adhere to convention and make a more traditional crumb topping so that it does in fact, remain a topping. 
Tossing the blueberries with 2 tablespoons of flour before adding to the batter would prevent them from sinking to the bottom. I did not do this, but if you'd like to prevent the bottom of your cake from seeing all the blueberry action, you should consider it. 


Blueberry Coffee Cake

Cake
1/2 cup unsalted butter, softened
1 cup, packed, light brown sugar (you could easily use only 3/4 cup sugar here)
3 eggs
1 tsp vanilla
2 tbsp fresh lemon juice
1 tbsp lemon zest
1 1/2 cups low fat yogurt
3 cups plus 2 tbsp cake and pastry flour, seperated
1 tsp baking powder
1 tsp baking soda
1 tsp salt
1 pint of blueberries, washed and dried 
Additional butter for greasing the pan

Topping
As mentioned above, for this to actually remain a topping, I'd advised substituting the ground almonds for regular all-purpose flour or, sprinkling the topping on the cake with about 20 minutes left in the baking time
1/4 cup almond flour (ground almonds)
1/3 cup brown sugar
1/2 cup slivered almonds, toasted
1 tsp cinnamon
2 tbsp unsalted butter, softened

Grease the pan that you're going to bake your cake in. I used an angel food cake pan, only because Big. Mr. and I got one for our wedding and I've yet to use it. Any pan would probably work for this cake, however, its quite a large amount of batter so I'd suggest using a deep dish 9 inch pie plate, or an 9 x13 pan or 2 loaf pans. A bunt pan would also work. Whatever your weapon of choice, grease that baby up well!

Make the topping. Combine almond flour (or regular flour) with sugar and cinnamon. Mix in sliver almonds. Mix in butter using your fingers to pinch together the butter with the other dry ingredients. Topping should resemble wet sand when done. Set topping aside.

Pre-heat oven to 350 degrees. 

In a large bowl using an electric mixer, cream together butter and sugar until light and fluffy, about 2 minutes. Beat in eggs, one at a time, allowing each egg to become fully incorporated before adding the next. Add lemon zest and juice and vanilla and mix on low . Add in yogurt and beat on low until all wet ingredients are fully incorporated.

In separate bowl, whisk together 3 cups of flour, baking powder, baking soda and salt.

Add half of flour mixture to the wet ingredients and mix on low until just incorporated. Scrape down bowl using rubber spatula. Add the remaining flour and mix on low until the remaining flour is just incorporated. 

In bowl from dry ingredients, toss the blueberries with 2 tbsp flour.

Pour half the batter into prepared pan. Sprinkle with floured blueberries. Top with remaining cake batter. If you'd like, crown your cake with topping now, keeping in mind my above warning about cinnamon-almond rivers. 

Bake the cake in the middle of the pre-heated oven for about 50 mins for an angel food cake pan. If you reserved your topping, check on the cake about 30 mins into baking and top with your prepared topping mix. Continue to bake for 20 more minutes or until wooden skewer inserted into the cake comes out with just a few crumbs clinging to it.

If you use a smaller pan, like a loaf pan, I would begin checking the cake for doneness at around 25 mins. 

Suggestions
A rhubarb coffee cake would be divine. If using rhubarb, try substituting 1/2 tsp ground ginger for the cinnamon. Apples or strawberries would be delicious too.


A little about Little Ms. Meals


Little Ms. is (almost) a lawyer who LOVES food.

Little Ms. is currently seeking out her dream lawyer job, and in the mean time, she decided to pursue her other passion, making food for the people she loves. One of the biggest problems is Little Ms.' life is that her Big Mr. hates onions, but Little Ms. strives to overcome this challenge, usually by making two batches of tuna.
Little Ms. comes from a family of cooks and food-lovers, who constantly advise (read: manage) each other when they are in the kitchen. Little Ms. cooked as a small child with her grandma, baked with her mom and learned her approach to recipes from her dad.  Little Ms. is kind of bossy, persistently positive and what she lacks in knowledge, she makes up for in confidence.

The Little Ms. POV

Little Ms. comes from a mixed-race family and that means that not only can she get a great tan, she can also make a mean curry. Little Ms. thinks that food is an adventure, and loves living in a big city, renowned for its ethnic diversity. Little Ms. knows that early exposure to many culinary cultures has contributed greatly to the development of her palate.
At a rather difficult time in her life, Little Ms. came up with a mantra of five rules. While most of those rules have gone out the window, along with her early twenties, one rule has stuck with Little Ms. through the formative years of her life. This rule is: OWN IT. If you try something and it doesn't work out the way you want it to - oh well; don't sweat it. YOU made it, YOU tried and YOU did your best. Now, stop worrying and call Panago.
Little Ms. believes that you can measure everything you need to make almost any recipe with a one cup dry measure. Sometimes that doesn't workout so well... Although Little Ms. is believes that recipes are strictly guidelines, she has made great strides to measure and write things down as she creates the recipes on this blog. Feel free to improvise. Little Ms. is firmly of the belief that if something grabs your attention, you should give it a whirl...even if that means substituting lemon zest for grapefruit because you forgot to look in your crisper before you started a recipe. Incidentally, Little Ms. made precisely this substitution when making this cake last week, to rave reviews. (Little Ms. also didn't make the topping and swapped out the rhubarb for strawberries. SEE? Recipes really are just jumping off points).
If Little Ms. Meals were on Top Chef Canada she would be at judges table frequently for not having a clear point of view (POV). Little Ms. is confident, however, that she could put her considerable advocacy skills to work in order to communicate that her POV IS clear. Little Ms. Meals is all about delicious, confident, sassy food  that people love to eat!
Disclaimer: Little Ms. cannot be held liable for the number of people that will show up at your door when you make her recipes, or the fact that you had to hire a housekeeper because people were constantly dropping by.

Enjoy!

Please enjoy this blog and feel free to comment on the posts and recipes. Please note that Little Ms. will not be held liable for removing comments she does not like. Remember, she warned you: she is bossy.